Theme Installation & Setup
There are two methods to upload a theme to a WordPress site: via the Admin Panel and through FTP. The most recommended approach is using the Admin Panel, as it’s simpler and more user-friendly. However, in some cases, file size limitations may prevent direct uploads. For this reason, this guide covers both methods.
Note:Unzip the downloaded Vixa package from ThemeForest, locate the “Vixa files” folder, and use the vixa.zip file inside it for installation via WordPress or FTP.
Method 1: Installing the Theme via WordPress
Step 1: Log in to your WordPress Admin Panel.
Step 2: Navigate to Appearance > Themes
Step 3: Click the Add New button, then select Upload Theme.


Step 4: Click Choose File, select vixa.zip file, and hit Install Now.

Step 5: Once the installation is complete, click Activate, and you will be redirected to the Themes page with Vixa activated.
Theme is now successfully installed and ready to use!

Method 2: Installing the Theme via FTP
- Download & Extract – Download the theme .zip file and extract it on your computer. You should see a folder containing the theme files.
- Connect to Your Server – Use an FTP client (like FileZilla) to connect to your WordPress site.
- Navigate to the Themes Directory – Go to
/wp-content/themes/in your WordPress installation directory. - Upload the Theme – Upload the extracted theme folder to the themes directory.
- Activate the Theme – Log in to your WordPress Admin Panel, go to Appearance → Themes, find the uploaded theme, and click Activate.
Theme is now successfully installed via FTP!
Plugin Installation & Configuration
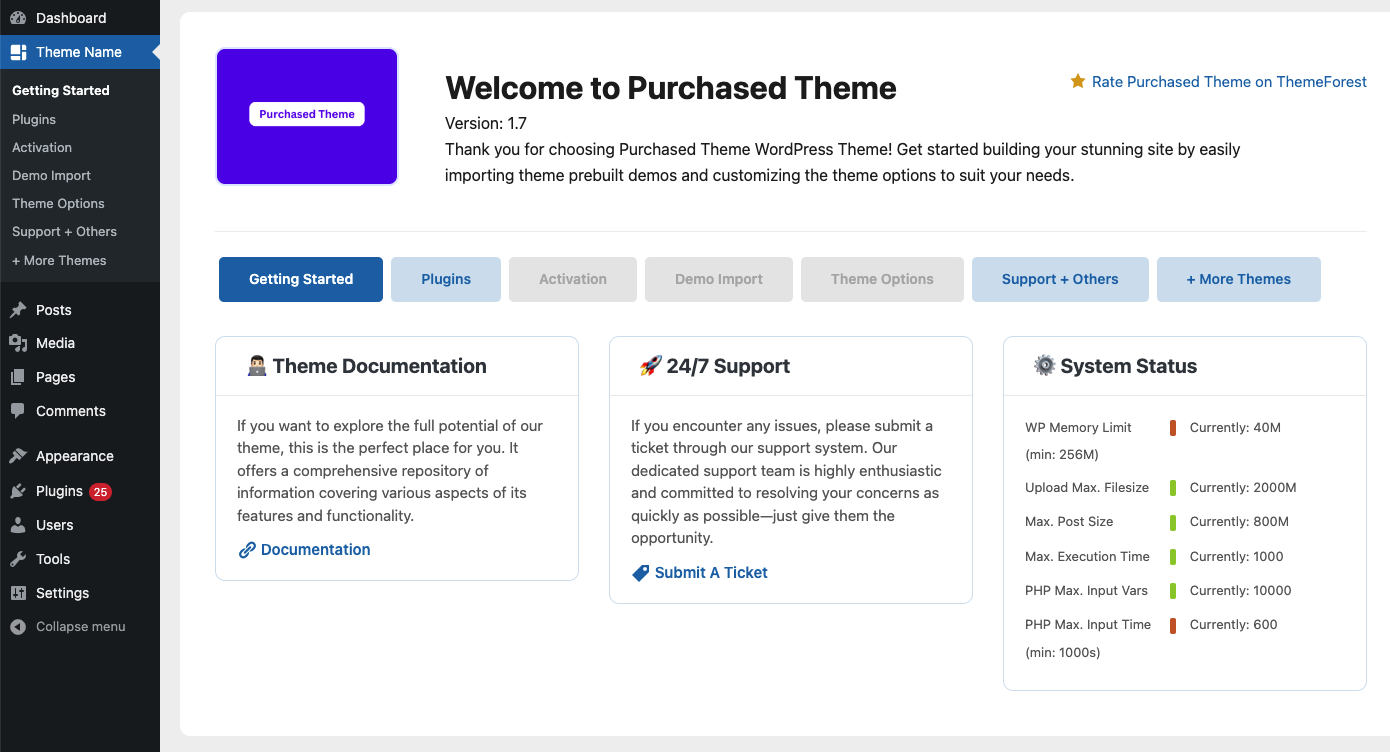
After activating Vixa, it will redirect to Theme Welcome page.

Next, click the “Plugins” button, which will take you to the Install Required & Recommended Plugins page.
Click “Activate All Plugins”, and it will automatically install and activate the required plugins.

The necessary plugins to ensure the proper functionality of Vixa theme:
Required Plugins:
- Vixa Toolkit – Core plugin for Vixa-specific features and functionalities.
- Elementor Page Builder – Drag-and-drop website builder for easy customization.
- Advanced Custom Fields PRO – Adds custom fields and enhances theme functionality.
Recommended Plugins:
- Contact Form 7 – Enables easy form creation and management.
- Elementor Header & Footer Builder – Enables custom header and footer design with Elementor.
- WooCommerce – Adds eCommerce functionality for online stores.
- Envy Demo Importer – Used for importing demo content.
The required plugins are crucial for the proper functioning of the Vixa theme. Without them, the core features of the theme will not work as expected.
The recommended plugins provide additional functionality to enhance your site, but they are optional and can be removed if not necessary.
Activation

Note: If purchase code show invalid! Please double-check your code carefully. Sometimes, the Envato API may not respond immediately, so try again after a few moments. If the issue persists, please submit a ticket in our support system here.
How to find your purchase code
- Log into your Envato Market account.
- Hover the mouse over your username at the top of the screen.
- Click “Downloads” from the drop-down menu.
- Click ‘License certificate & purchase code’ (available as PDF or text file).
Import Demo Content
Vixa offers two methods for demo importing to enhance user convenience: Automatic and Alternative. These options ensure a smooth import process, providing a reliable fallback if any issues occur with one method.
Method 1: Automatic Import
Want to set up your site just like the demo? You can do it with a single click!
Note: Before proceeding, keep in mind that importing the demo will overwrite all existing settings and content with demo data. It is highly recommended to perform this action on a fresh site.
Steps to Import the Demo:
- From the Admin Menu, go to Tools → Demo Content Install.
- On this page, click the Install button to start the demo installation.
- The import process may take some time to complete.
- Once the demo data is imported, update your permalink settings by navigating to Settings → Permalinks, then clicking the Save Changes button.


Note: After completing the demo import, you can deactivate the Hibo Demo Importer plugin.
Method 2: Alternative Import
- Install and activate the One Click Demo Import plugin.
👉 Download Plugin - From the Admin Menu, navigate to Appearance → Import Demo Data.
- On this page, click the Import button to install any demo. The process may take some time.
- After the demo data is imported, update your permalink settings:
- Go to Settings → Permalinks
- Click the Save Changes button
