Follow these instructions to download and prepare the Edvik theme for your Moodle site.
Step 1: Download from ThemeForest
After purchasing Edvik from ThemeForest, go to your ThemeForest account.
Navigate to the Downloads tab.
Click on the download button and choose: “All Files & Documentation” (Full ZIP folder).
Step 2: Unzip the Downloaded File
Once the ZIP file is downloaded, extract/unzip it.
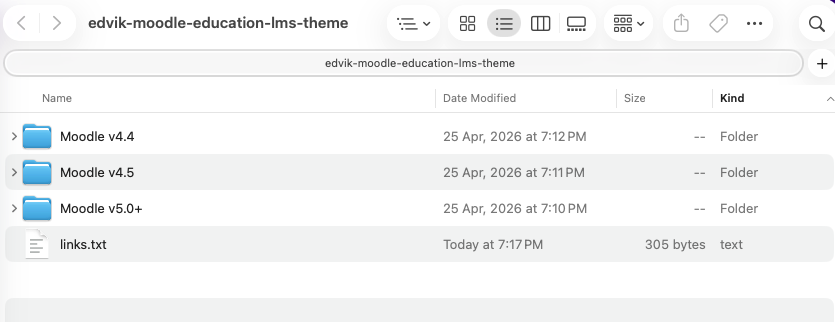
You will see a folder structure like this:
Inside the unzipped folder, you’ll find Moodle version-specific folders. You can choose the version that matches your Moodle installation.
Important: Each version is optimized specifically for its supported Moodle release. Forward or backward compatibility between different Moodle versions is not guaranteed.
Access Demo Files via link.txt:
Inside the root of the package, open the link.txt file.
It contains links for:
Demo Moodle core fileslink
Demo Moodledata folderlink
Documentationlink
These demo files will help you replicate the exact layout and functionality shown in the theme demo.
Theme Installation & Demo Setup
Follow these steps to successfully install the Edvik demo content on your Moodle site.
Step 1: Create a Database
Log in to phpMyAdmin
Create a new database
Step 2: Import Demo SQL File
Open your newly created database in phpMyAdmin.
Click on Import.
Choose and import the edvik.sql file from the demo package.
Step 3: Upload Files
Inside the unzipped demo folder, open the links.txt file to get the download link for demo_files.zip.
Download demo_files.zip.
Upload and extract it on your web server (e.g., inside var/www/htdocs/ or your domain root).
Use an FTP client like FileZilla to upload the extracted demo_files folder to your web server.
Open the links.txt file to find the download link for moodledata.zip.
Download moodledata.zip.
Upload and extract it outside your webroot (e.g., /var/www/moodledata/).
Important: Ensure the moodledata directory has read and write permissions. Refer to Moodle.org for more on file permissions.
Step 5: Configure config.php
Open the config.php file located in your Moodle root directory.
Update the following:
$CFG->directorypermissions – typically 0755 or 0775 depending on your server configuration.
$CFG->dbhost – usually localhost or 127.0.0.1.
$CFG->wwwroot – use your actual site URL.
$CFG->dataroot – path to your moodledata directory.
$CFG->directorypermissions – typically 0777 or 0755.
Step 6: Log In
Visit: {your-site-url}/login/index.php
Use the following admin credentials:
Username: edvik
Password: EdvikPass1@
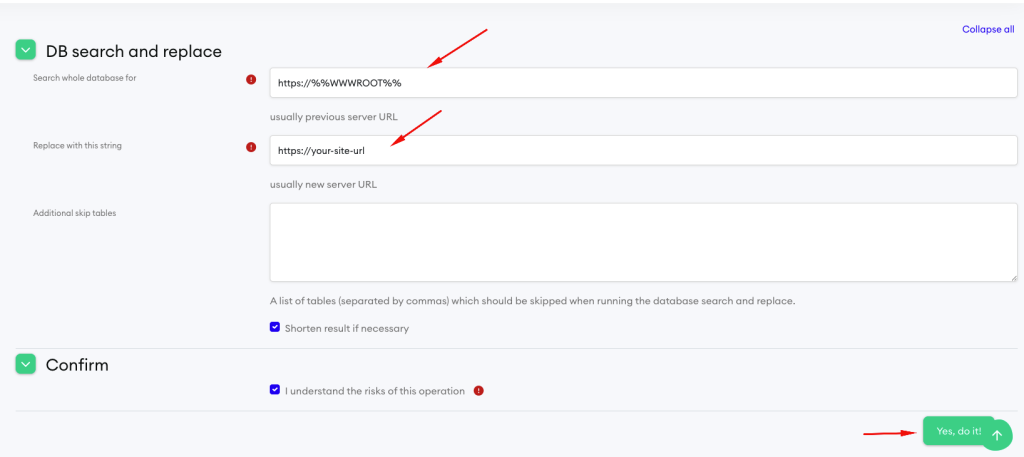
Step 7: Replace Demo URL Placeholder
Go to: {your-site-url}/admin/tool/replace/
Enter the old URL
Replace it with your current site URL
Replace all placeholder URLs with your actual Moodle site URL:

Placeholder	        Replace With
https://%%WWWROOT%%	https://your-site-url
https://{{WWWROOT}}	https://your-site-url
Click Submit to complete the URL update.( This may take a few minutes. Be patient.)
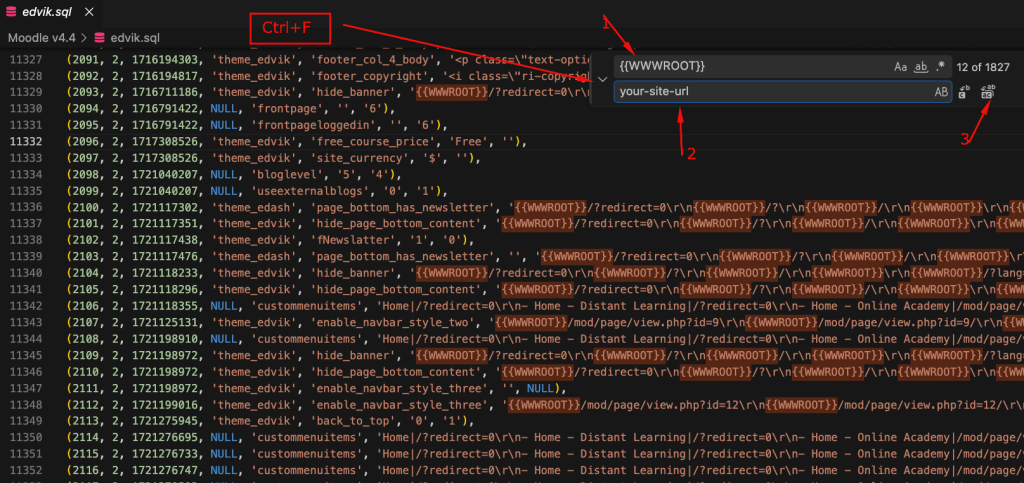
Note: If the Find & Replace tool from the Moodle dashboard does not work on your server, open the demo .sql file using a code editor such as VS Code and manually replace the placeholder URLs with your actual site URL.
Placeholder	        Replace With
%%WWWROOT%%	        https://your-site-url
{{WWWROOT}}	        your-site-url
After updating the SQL file placeholders, open phpMyAdmin, select your database, and import the updated SQL file.
Step 8: Purge Moodle Cache
Visit: {your-site-url}/admin/purgecaches.php
Click ‘Purge all caches’
Final Step: Change Admin Password
For security reasons, please change the administrator password after your first login.